
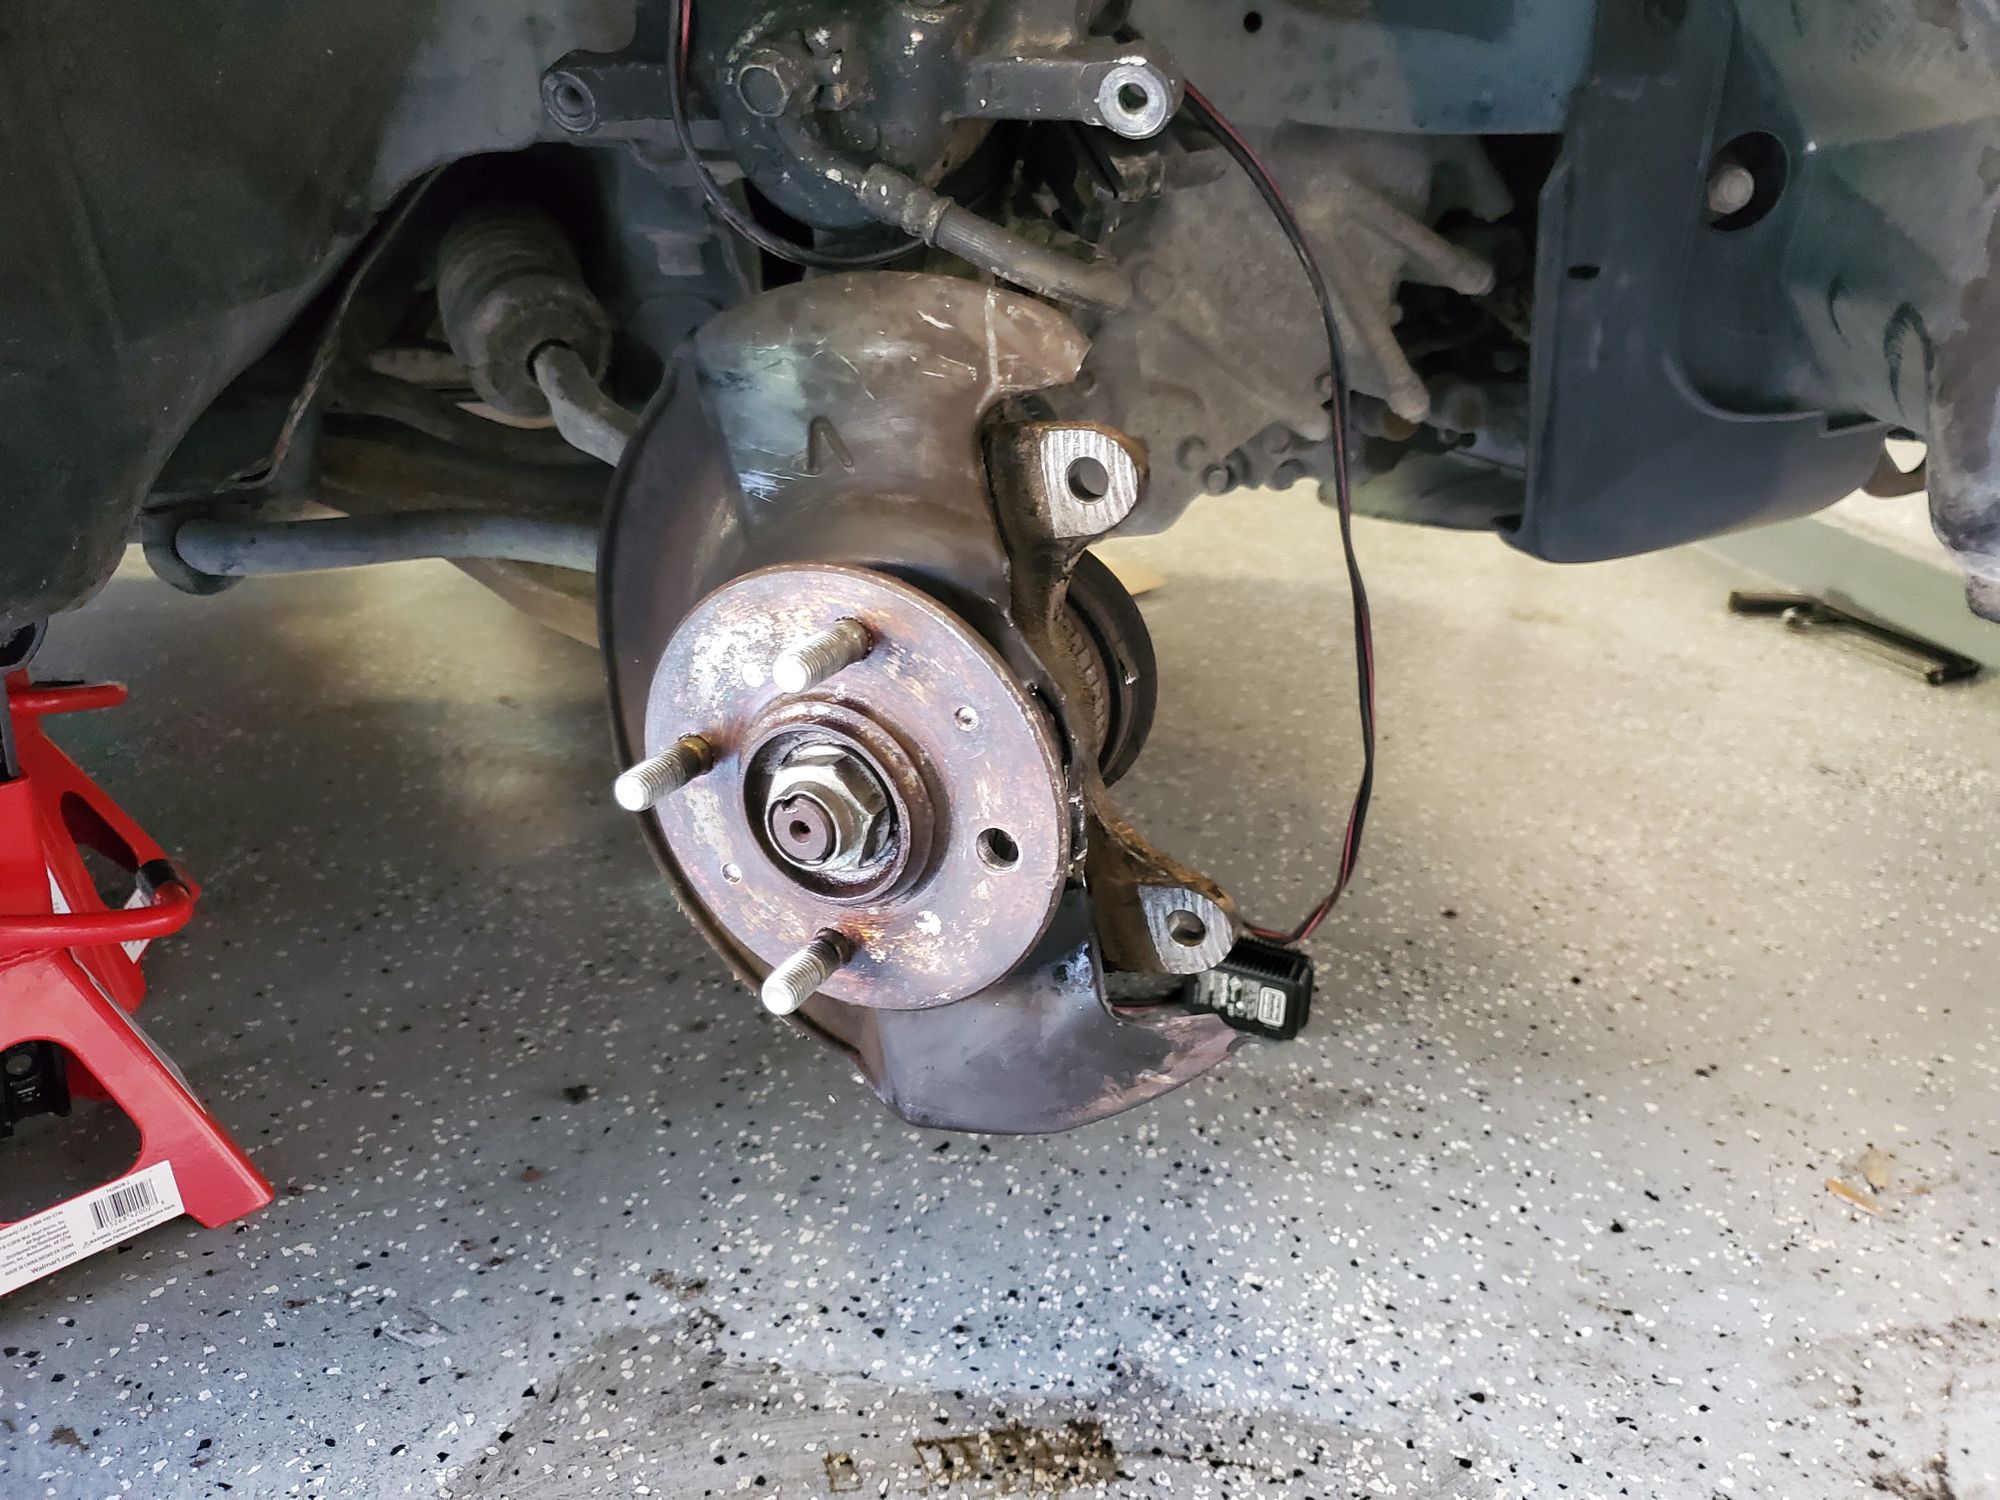
After I finished cleaning up the car and doing general repairs/maintenance, I started looking at what else I needed to pass the state inspection. Everything from the brakes to the lights looked just fine, until I got to checking the wheels: I found that the front passenger side wheel was missing a lug nut because the stud had sheared off. Little did I know that this small repair would lead to a lot more front-end work before I could get everything ready to drive.
This looked like it would be pretty easy to fix, I'd just have to hammer the old stud out of the hub and press the new one in. I couldn't be that hard, right? Wrong.
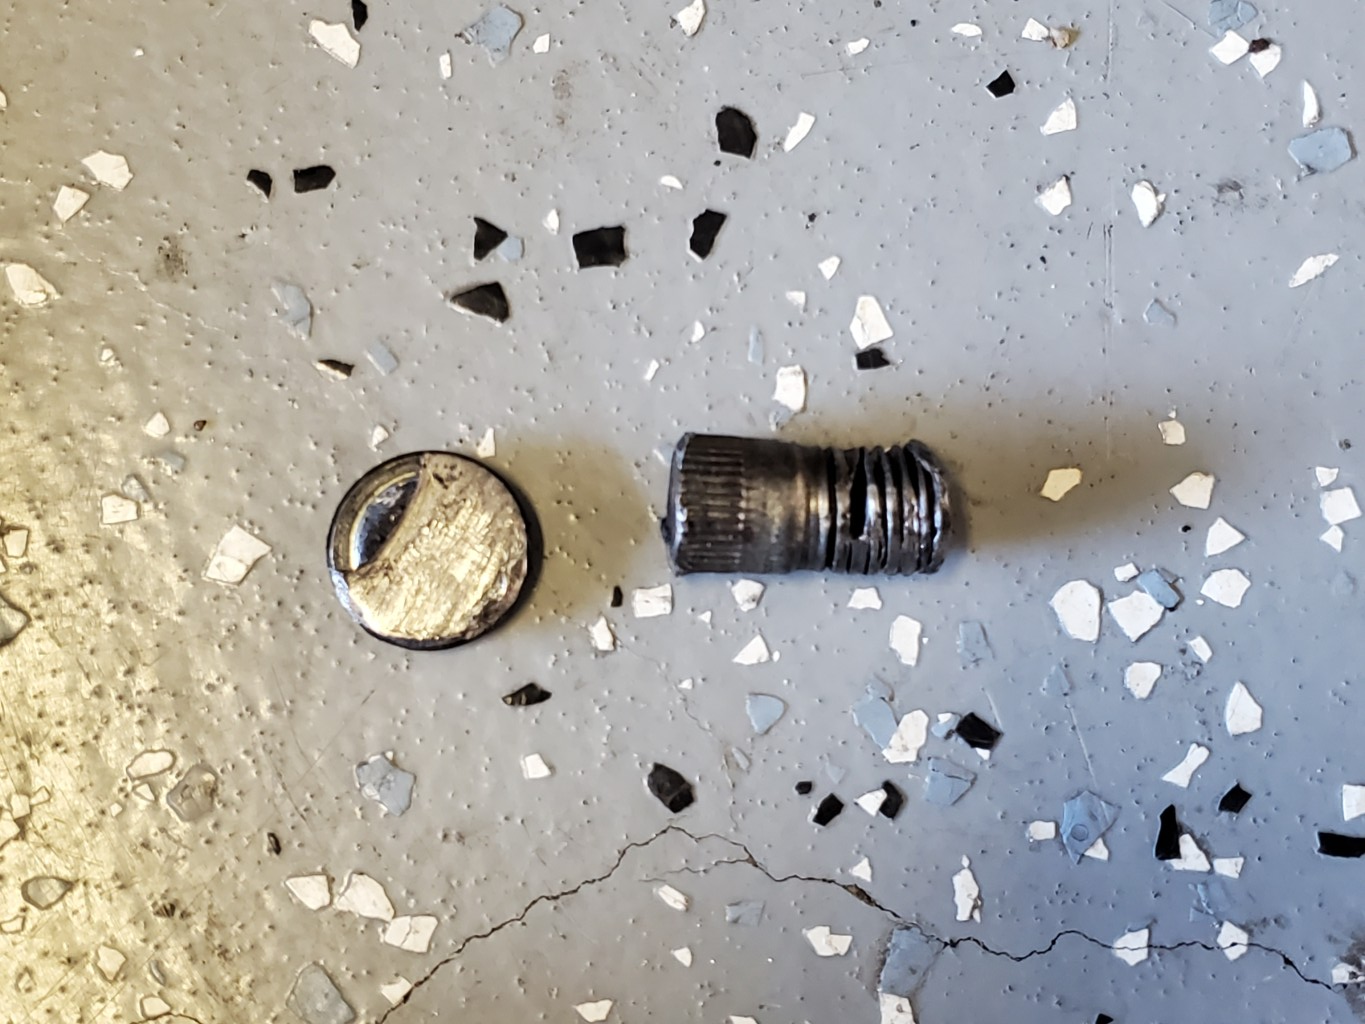
I was able to get the old lug stud out by sawing off the head and hammering it with a 3 pound hammer, but there wasn't even close to enough space to insert a new stud. The steering knuckle had such little clearance that it was impossible to pull in a new stud, no matter the orientation of the wheel hub.
At this point, it seemed that I'd have to replace the entire wheel bearing and hub assembly just for this one lug stud. So, I set out finding parts, and two disastrous Rockauto order screw-ups later, I had a compatible wheel bearing and hub assembly on my hands.
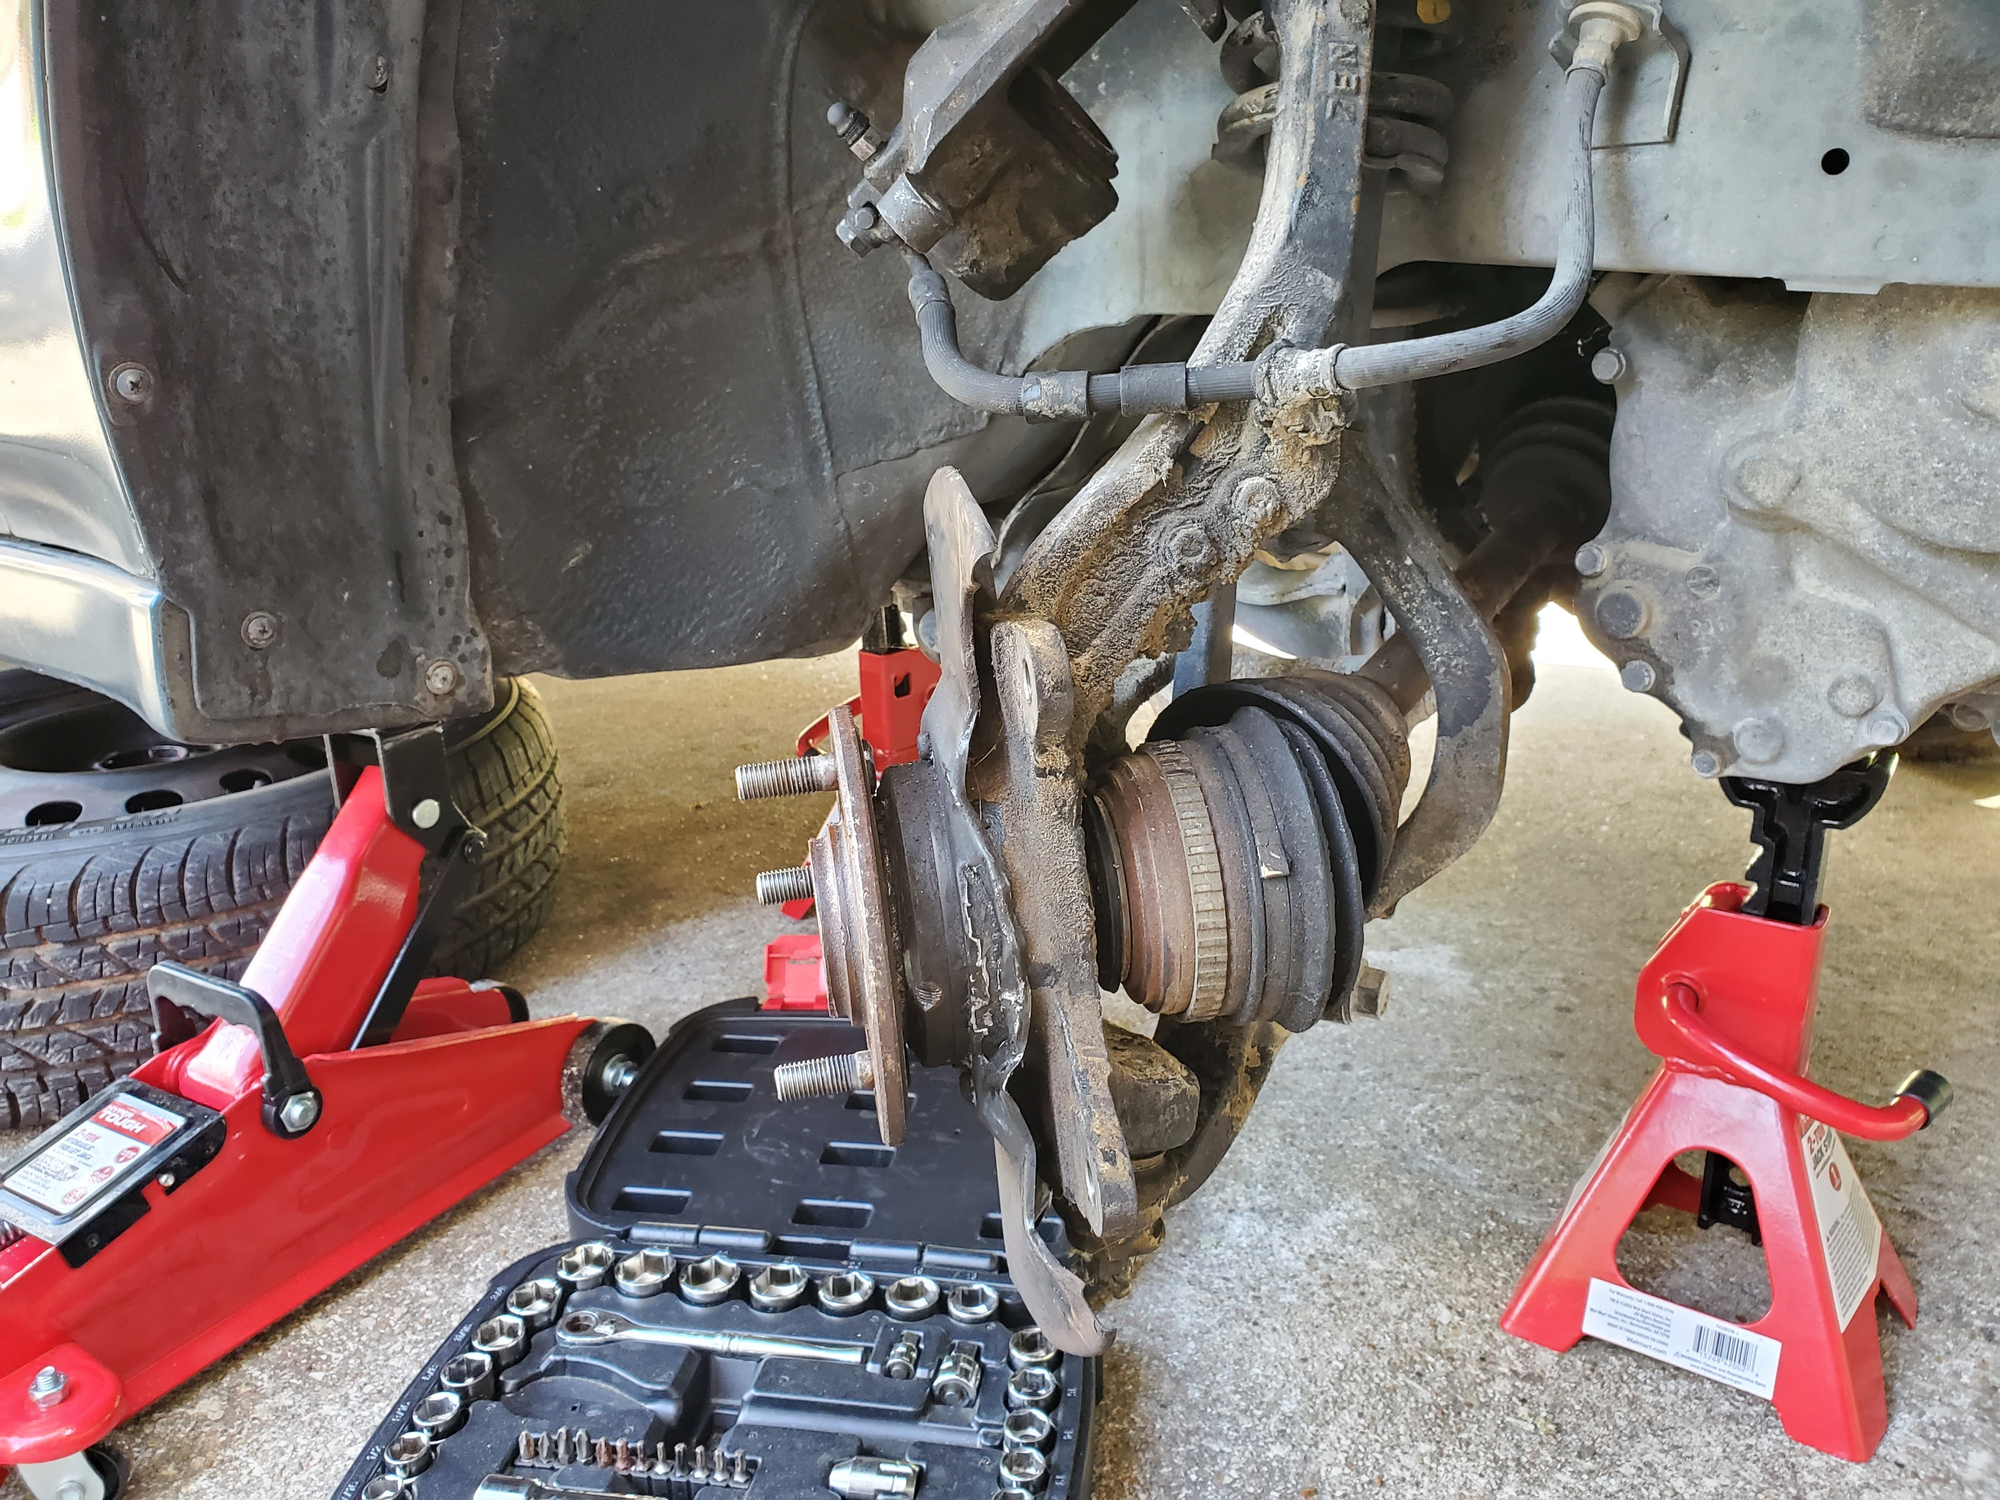
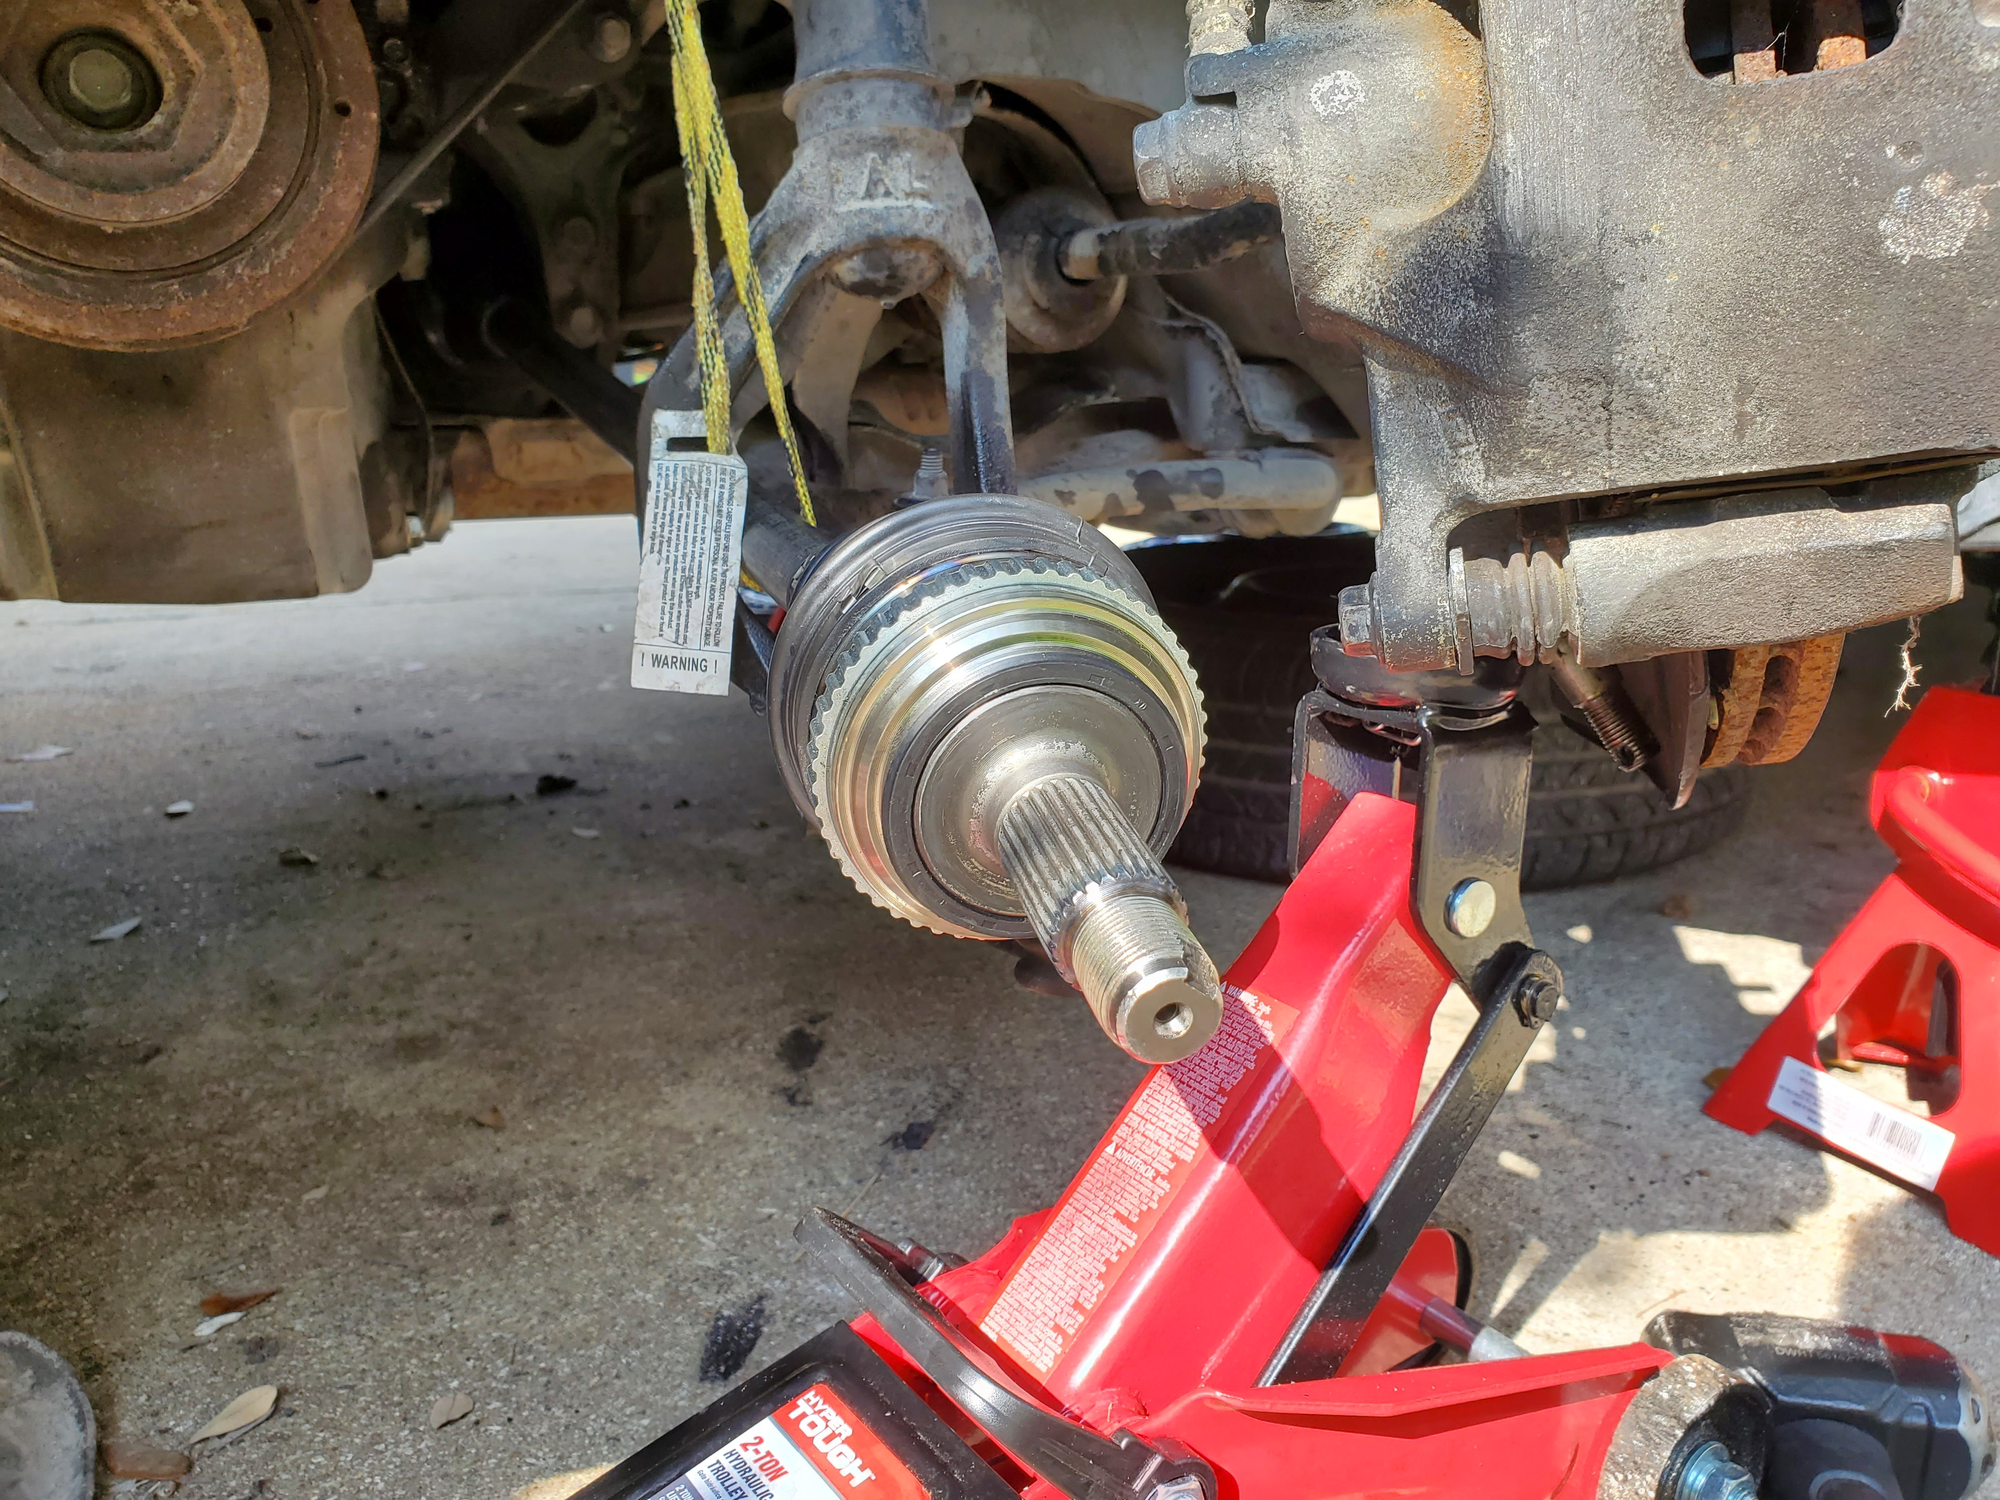
In order to install it, I had to remove the entire steering knuckle, starting with the outermost part, the axle nut. This nut was stuck on so tight that no amount of WD-40 would loosen it. I ended up having to heat it up using Mapp gas and candle wax, which seeps inside the threads. Using this method, I was able to remove it using a large socket and a cheater bar.
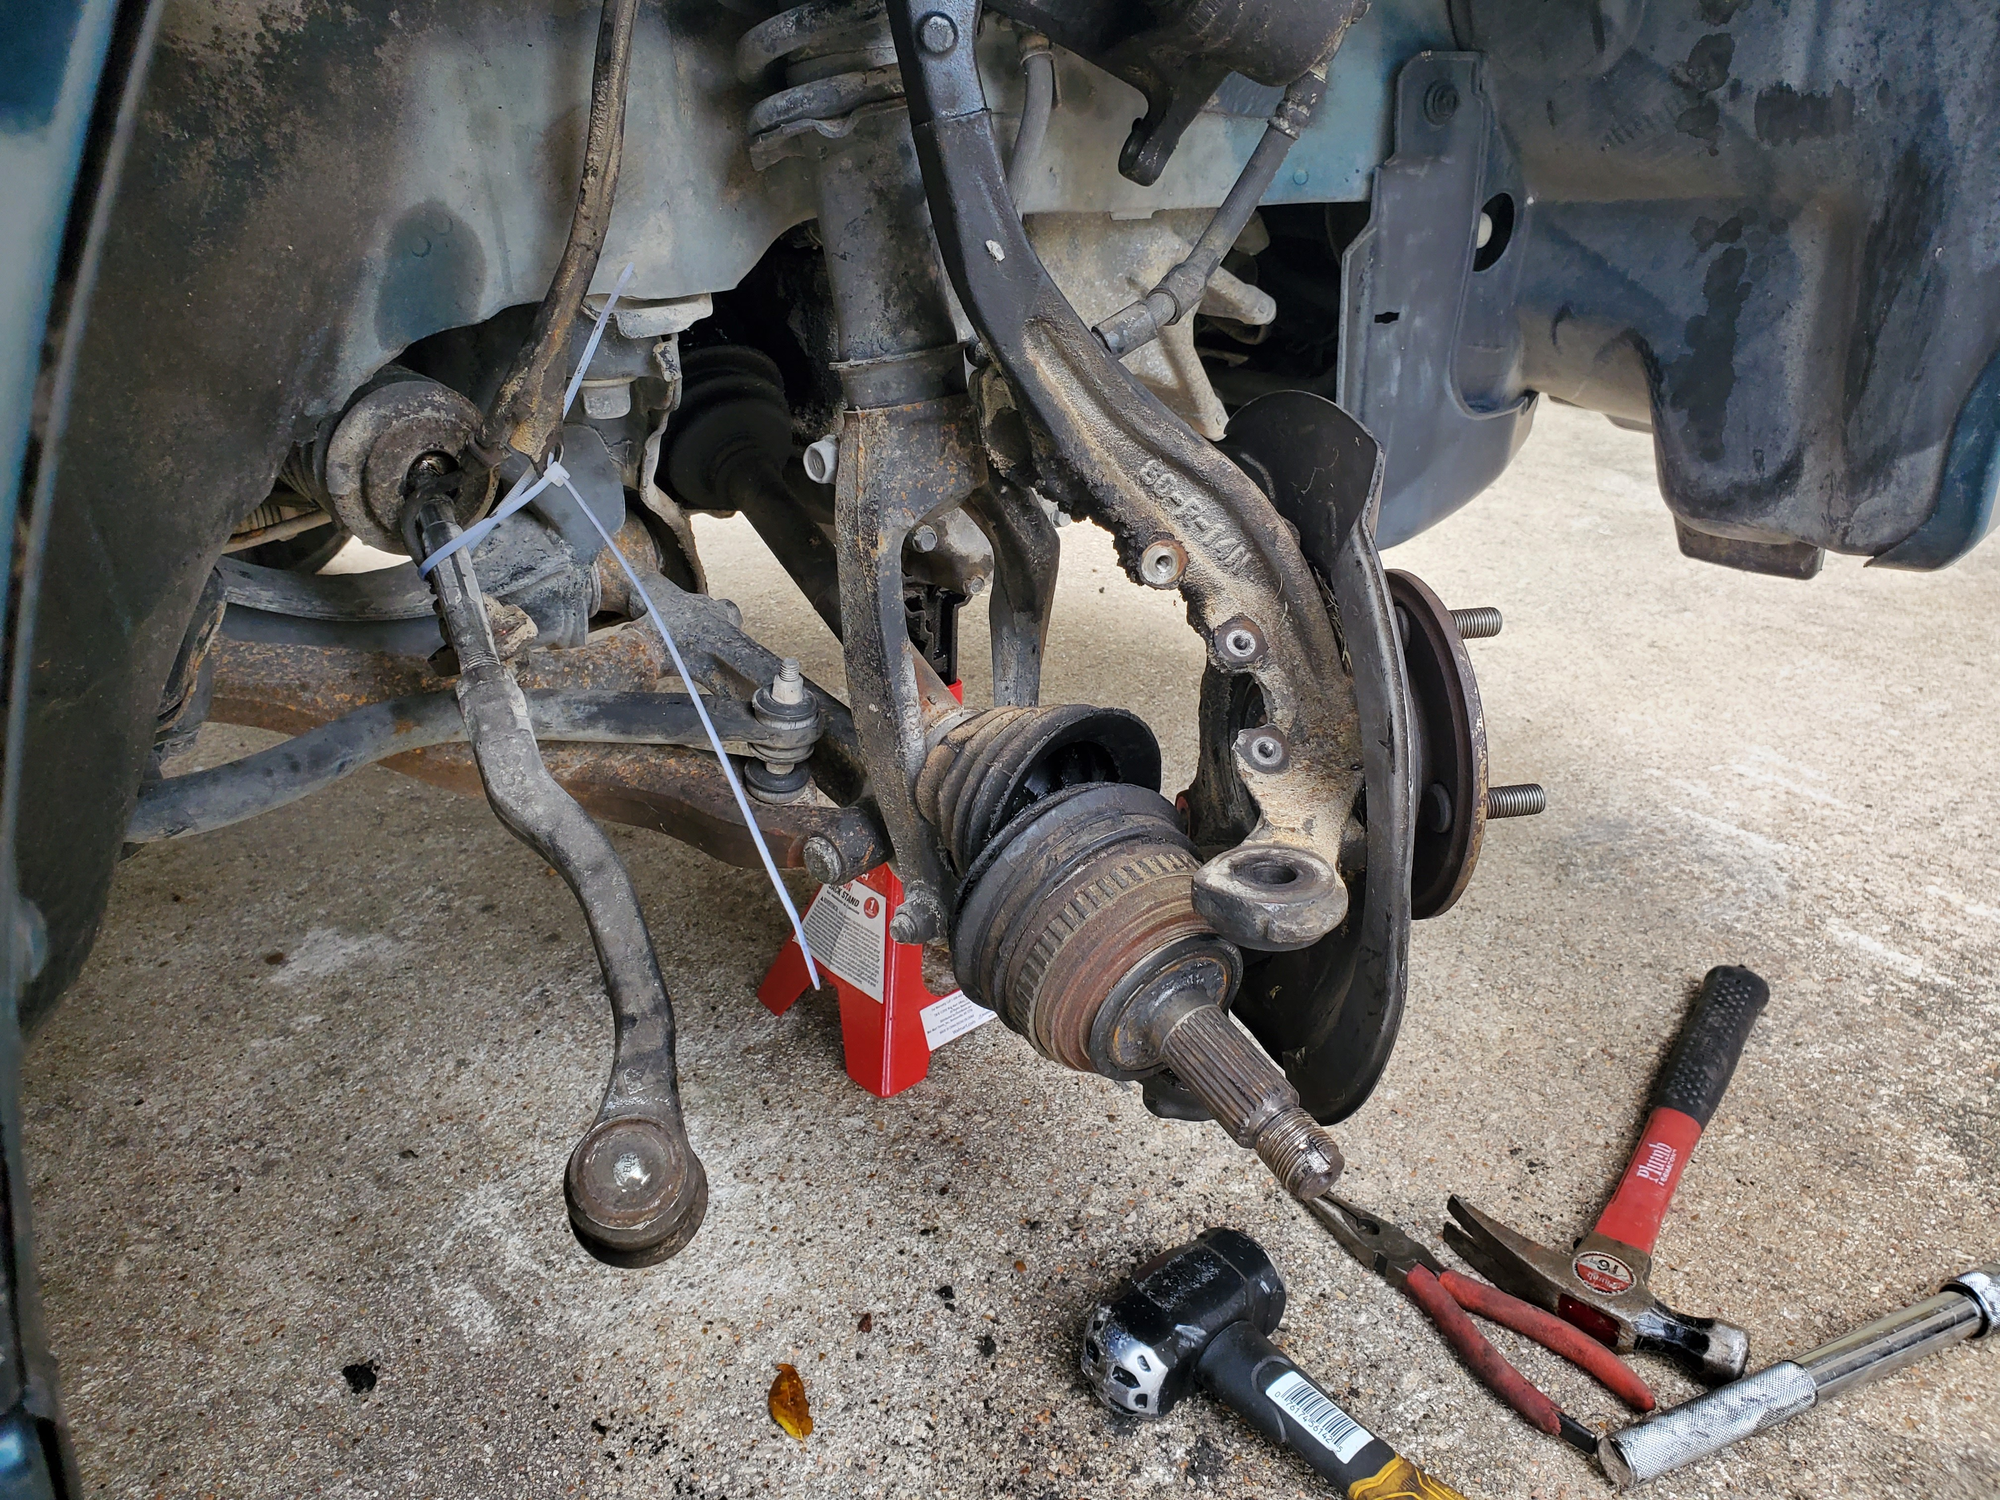
Then I removed the upper and lower ball joints and the knuckle came off fully. This revealed that the CV axle boot was fully torn, so I'd have to replace that as well. I ended up removing the driver's side axle as well, since it was also in bad shape.
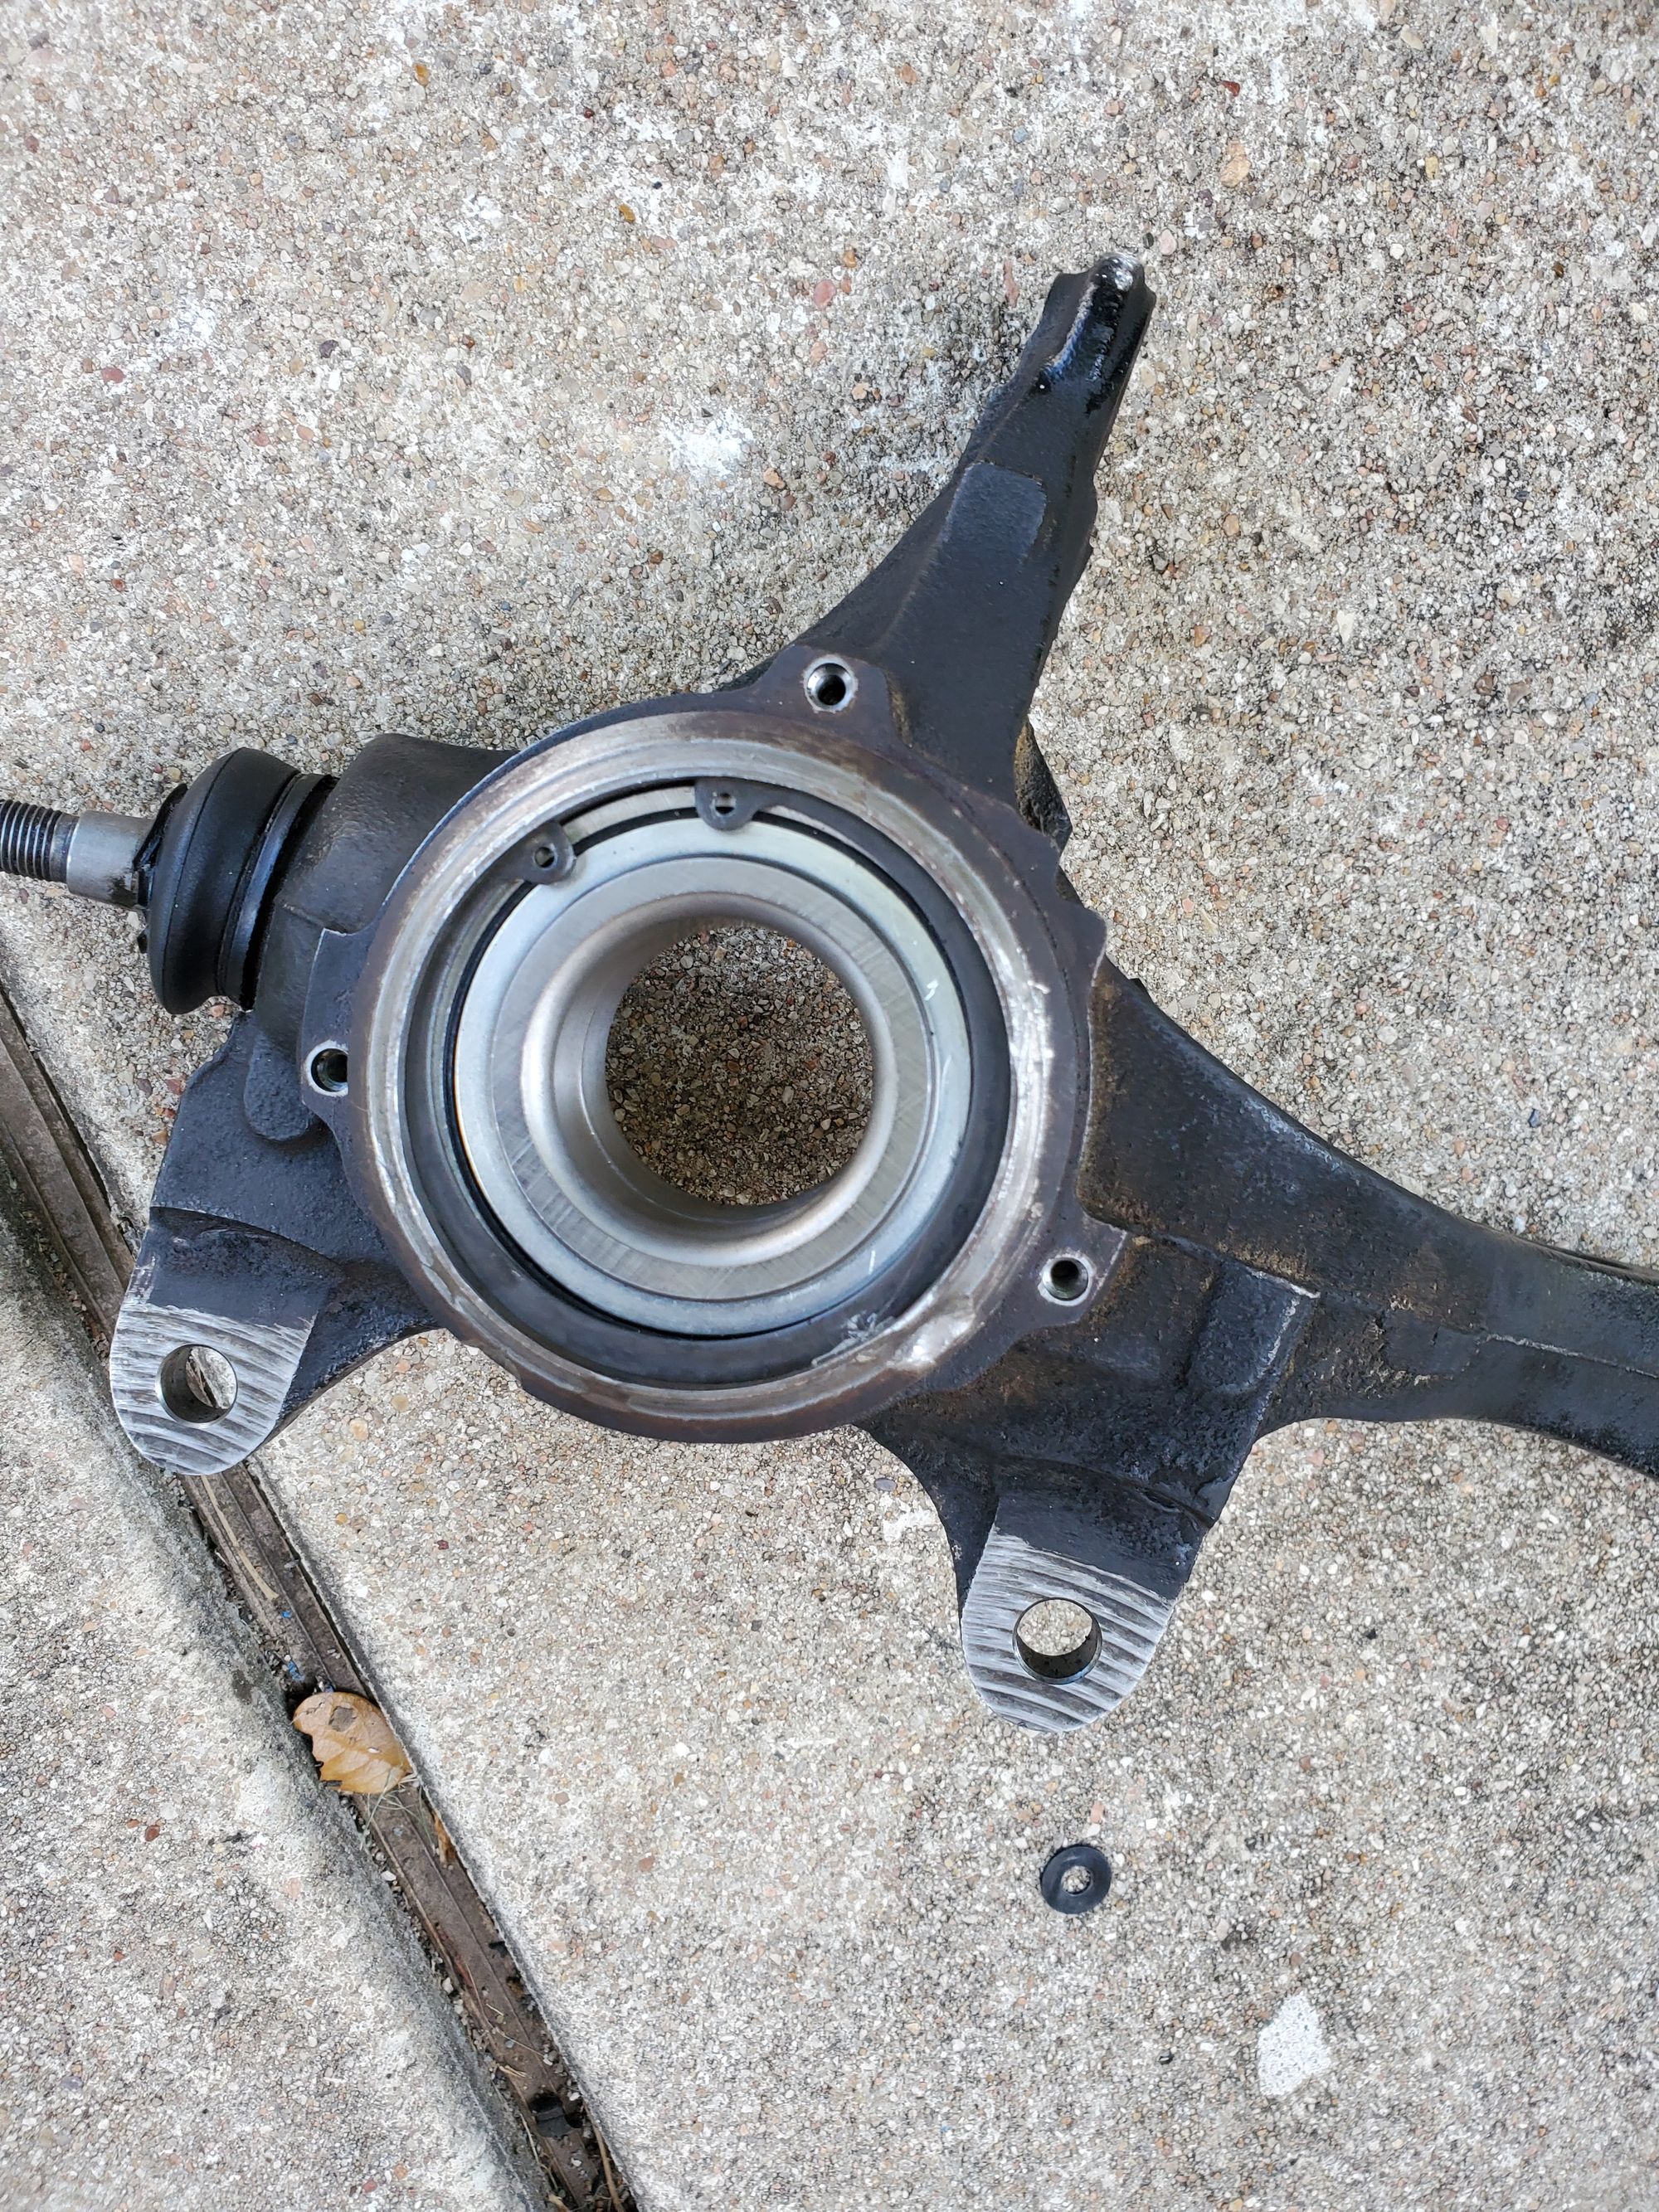
Finally, to remove the old wheel hub and bearing from the steering knuckle, I secured the knuckle above ground and hammered out the bearing using an axle nut socket.
I started re-installation with the CV axles, which I replaced with new GSP axles that fit perfectly. Both sides slotted in easily, and I used straps to keep them out of the way when reattaching the knuckles.
To install the new wheel bearing and hub in the knuckle, I first put the new parts in the freezer so they'd shrink slightly and become easier to install. Then, I greased both parts with wheel bearing grease. After this, I used a wheel bearing press to press the bearing into the knuckle and the hub into the bearing. ChrisFix's video helped out a ton with this part.
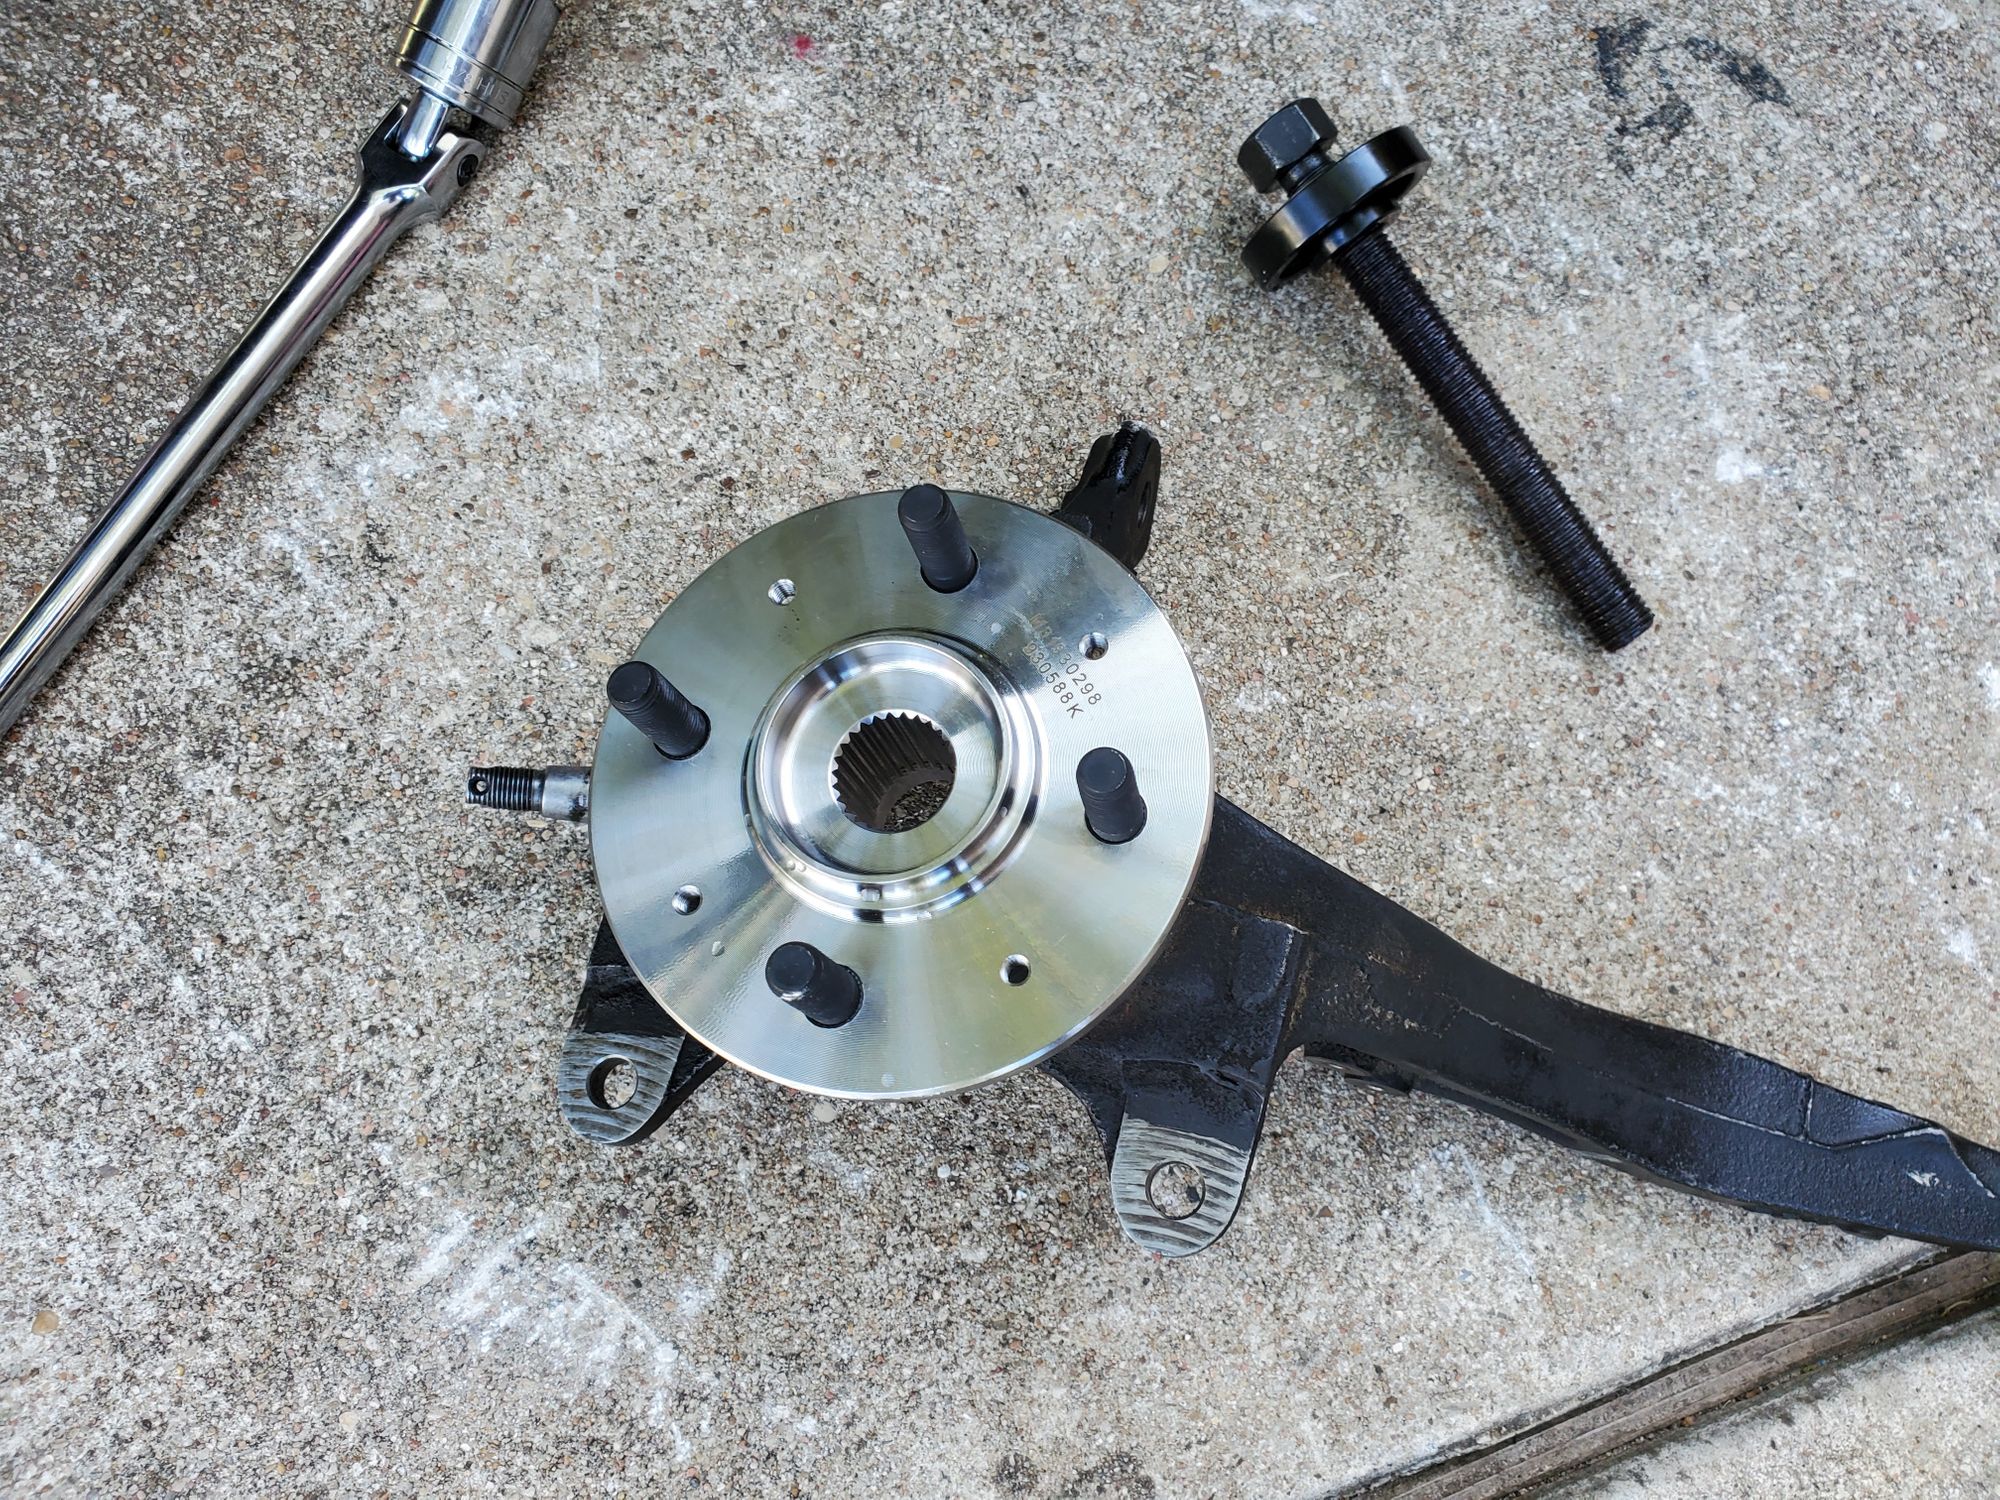
Finally, I reinstalled the knuckle, along with the brake rotor, caliper, and pads. After putting the wheel back on and letting the car down, I torqued down the new axle nut and the new lug nuts.
What was originally a small repair to meet state inspection rules turned into a weeks-long process replacing the CV axles, wheel bearing and wheel hub, along with disassembling much of the front suspension. While it might have been a time-consuming job, I learned quite a lot from it and my Civic was finally ready to pass inspection!
I hope you enjoyed reading this post! If you'd like to read more about my journey in restoring this salvage car, you can find all my other posts here. I've also worked on a lot of other engineering projects, if you'd like to check those out as well. Thanks for reading and have a great day!