
In this blog post, I'll show you how to install and configure a great dashboard called Homer, which allows you to easily access all of your home servers and the services they're running.
What is Homer?
Homer is a simple, easy-to-configure dashboard which allows you to have quick access to each of your services. You can organize your services by purpose, type, or what server they're hosted on.
Installing Homer
The easiest way to install Homer is by using Docker. To install using Docker, type the following command:
docker run -p 8080:8080 -v /your/local/assets/:/www/assets b4bz/homer:latest
You can change the port to something other than 8080 by using "yourport:8080" instead of "8080:8080". Make sure to also replace "/your/local/assets/" with the path you'd like to use for Homer's assets.
Once Homer is installed, you should be able to access it at http://serverip:8080.
Modifying the Config File
Once you've confirmed that it's running properly, we can begin modifying the configuration file to personalize our dashboard. To do this, open "/your/local/assets/config.yml" with a text editor, replacing "/your/local/assets" with the proper path to your assets directory.
The default config file will have something similar to what you see below:
---
# Homepage configuration
# See https://fontawesome.com/icons for icons options

title: "Demo dashboard"
subtitle: "Homer"
logo: "logo.png"
# icon: "fas fa-skull-crossbones" # Optional icon

header: true
footer: '
Created with ❤️ with bulma, vuejs & font awesome // Fork me on

' # set false if you want to hide it.

# Optional theme customization
theme: default
colors:
  light:
    highlight-primary: "#3367d6"
    highlight-secondary: "#4285f4"
    highlight-hover: "#5a95f5"
    background: "#f5f5f5"
    card-background: "#ffffff"
    text: "#363636"
    text-header: "#ffffff"
    text-title: "#303030"
    text-subtitle: "#424242"
    card-shadow: rgba(0, 0, 0, 0.1)
    link-hover: "#363636"
  dark:
    highlight-primary: "#3367d6"
    highlight-secondary: "#4285f4"
    highlight-hover: "#5a95f5"
    background: "#131313"
    card-background: "#2b2b2b"
    text: "#eaeaea"
    text-header: "#ffffff"
    text-title: "#fafafa"
    text-subtitle: "#f5f5f5"
    card-shadow: rgba(0, 0, 0, 0.4)
    link-hover: "#ffdd57"

# Optional message
message:
  #url: https://b4bz.io
  style: "is-dark" # See https://bulma.io/documentation/components/message/#colors for styling options.
  title: "Demo !"
  icon: "fa fa-grin"
  content: "This is a dummy homepage demo.
 Find more information on github.com/bastienwirtz/homer"

# Optional navbar
# links: [] # Allows for navbar (dark mode, layout, and search) without any links
links:
  - name: "Contribute"
    icon: "fab fa-github"
    url: "https://github.com/bastienwirtz/homer"
    target: "_blank" # optional html a tag target attribute
  - name: "Wiki"
    icon: "fas fa-book"
    url: "https://www.wikipedia.org/"

# Services
# First level array represent a group.
# Leave only a "items" key if not using group (group name, icon & tagstyle are optional, section separation will not be displayed).
services:
  - name: "Applications"
    icon: "fas fa-cloud"
    items:
      - name: "Awesome app"
        logo: "assets/tools/sample.png"
        subtitle: "Bookmark example"
        tag: "app"
        url: "https://www.reddit.com/r/selfhosted/"
        target: "_blank" # optional html a tag target attribute
      - name: "Another one"
        logo: "assets/tools/sample2.png"
        subtitle: "Another application"
        tag: "app"
        url: "#"
You can configure the theme colors, set messages, and add bookmarks under specific categories.
To change your theme colors, you can modify the color codes under the "colors" section of the configuration:
colors:
  light:
    highlight-primary: "#3367d6" <--- Change these color codes
    highlight-secondary: "#4285f4"
    highlight-hover: "#5a95f5"
    background: "#f5f5f5"
    card-background: "#ffffff"
    text: "#363636"
    text-header: "#ffffff"
    text-title: "#303030"
    text-subtitle: "#424242"
    card-shadow: rgba(0, 0, 0, 0.1)
    link-hover: "#363636"
  dark:
    highlight-primary: "#3367d6"
    highlight-secondary: "#4285f4"
    highlight-hover: "#5a95f5"
    background: "#131313"
    card-background: "#2b2b2b"
    text: "#eaeaea"
    text-header: "#ffffff"
    text-title: "#fafafa"
    text-subtitle: "#f5f5f5"
    card-shadow: rgba(0, 0, 0, 0.4)
    link-hover: "#ffdd57"
Once you modify your theme colors, we can add actual content to the webpage. To do this, we can modify the section called "services." This section can contain groups, which have individual items. These items can be configured as bookmarks for your services, and they can have their own names, tags, and logos. For my configuration, I organized my services into groups based on which server they were running on.
services:
  - name: "Applications" # Name of your group
    icon: "fas fa-cloud" # Icon of your group
    items:
      - name: "Awesome app" # Name of the service
        logo: "assets/tools/sample.png" # Logo
        subtitle: "Bookmark example" # Subtitle
        tag: "app" # Tag
        url: "https://www.reddit.com/r/selfhosted/" # URL
        target: "_blank" # optional to open in a new tab
      - name: "Another one" # Add another service
        logo: "assets/tools/sample2.png" # Logo
        subtitle: "Another application" # Subtitle
        tag: "app" # Tag
        url: "#" # URL
To add a new group or service, simply copy and paste the previous one and edit the config values.
At this point, you might be wondering how to modify the default icons on Homer so each service can have a personalized icon. To do this, you have to place a file in the "/your/local/assets/tools/" directory. Since I don't have samba access to the folder I'm using for the assets, I had to devise a (sort of) hacky solution. To download the files directly to my server, I entered the assets directory and typed the following wget command for each logo, replacing the URL with the URL to the logos.
wget https://example.com/image.png
Once you have the logos, it's just a matter of changing these lines in the config under each group/item to match the file path.
logo: "assets/tools/image.png"
Once you're satisfied with your config, you can save and restart Docker using the command below:
sudo docker restart container_name_or_hash
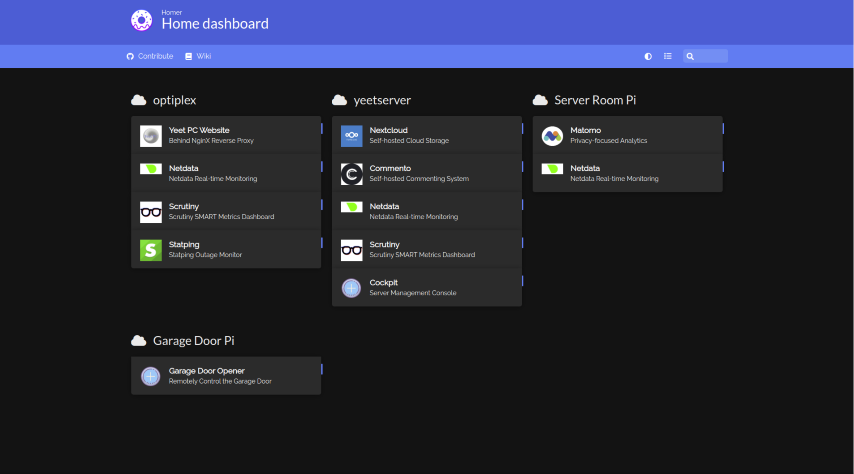
Finally, navigate to http://serverip:8080/, and you'll see your new Homer dashboard. Here's mine:

Well, that's all for this post. If you liked reading it, make sure to check out my other posts about servers, such as Setting up an NginX Reverse Proxy, and Hardening your Linux Server. If you have any questions or comments, be sure to leave your thoughts down below. See y'all next time!