
In this blog post, I'll show you why (and how) to self-host every part of your website or web app. Let's get started!
Intro to Self-hosting
In 2021, it's very easy to create a website or web app and host it on a platform that manages everything for you. The inherent problem with this is that you have little to no control over where your data is stored and how it is handled by the hosting company. To take control of your data and your website's configuration, you can host it on your own computer, in your own house or office. This also allows you to get around many of the restrictions set by hosting companies, such as limits on CPUs, RAM, storage, and network bandwidth.
There are a lot of important concepts involved with self-hosting, and this guide will only scratch the surface of many of those. To get a better understanding of these concepts, I recommend checking out the r/selfhosted subreddit and its associated wiki.
A Server
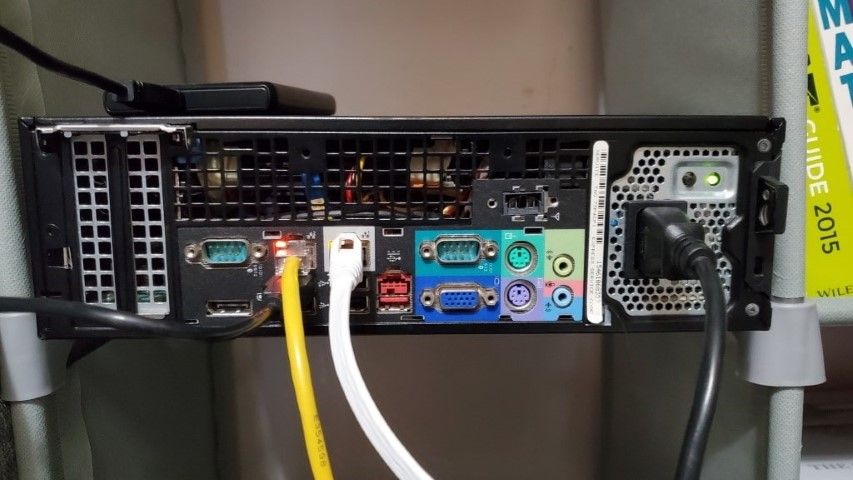
The first thing you'll need to host a website or a web app is a server that can run a web server such as Apache or Nginx. All you need to set up a server is a spare computer that you can keep plugged in 24/7, an ethernet cord, and a monitor. After you have the hardware, you can move on to installing an operating system. If you're a beginner to servers and Linux operating systems, I would recommend Ubuntu 20.04 or 18.04 LTS. To install Ubuntu Server, you can watch my video guide, which demonstrates how to download and install Ubuntu Server, along with finding your server's IP address, installing updates, and setting up a firewall. You can stop the video at 8:30, after the firewall is set up.
Accessing your Server Over the Internet
Now that your server is up and running, we have to expose it to the internet. To do this, you can set up port forwarding on your router or modem. First, visit your router's IP address and login with your username and password. Then, click on Advanced, and then Port Forwarding (the menus may be a little different depending on the router's model). After this, add a port forwarding rule for port 80 and port 443 of your server's IP, as you can see below.
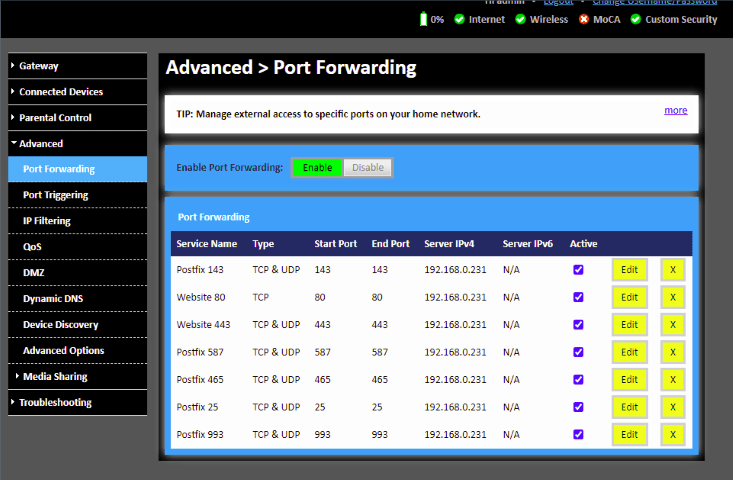
Now, your server should be opened to the Internet on ports 80 and 443 of your public IP address.
The last thing you need to do is to purchase a domain name from a registrar such as GoDaddy or Google Domains, and add DNS records pointing to your server's public IP address (search "what is my ip" to find this). Below is an example using CloudFlare's DNS.
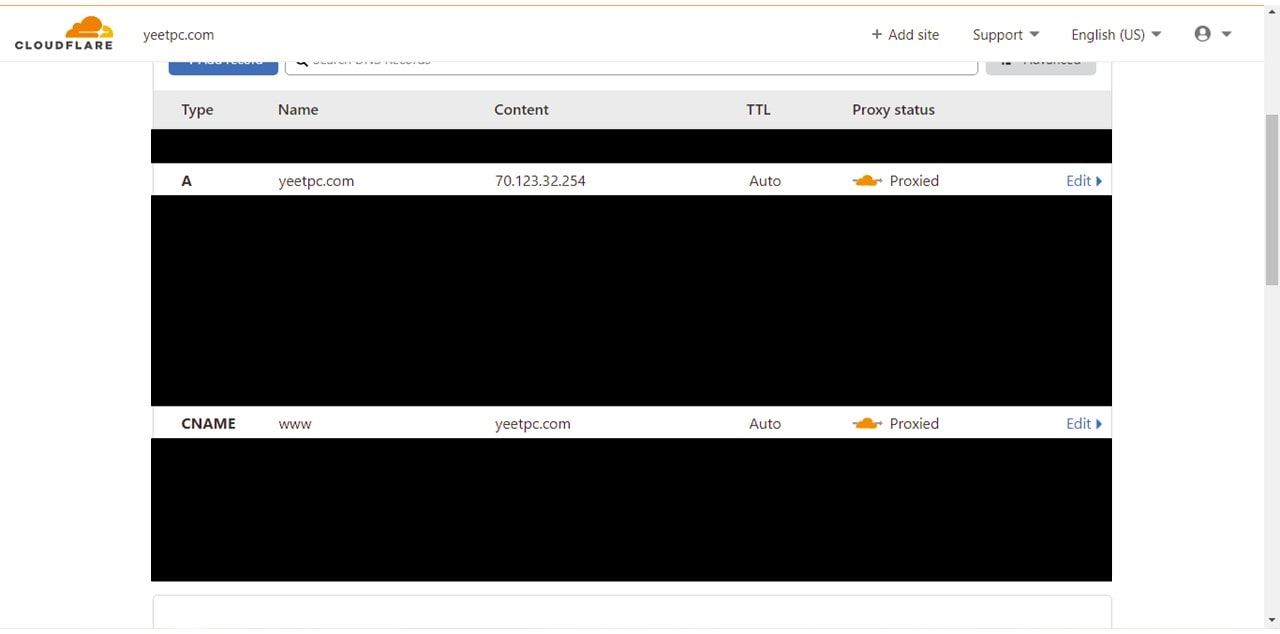
The two main records to add are the A record, which points your domain name to your public IP, and the CNAME record, which maps the www subdomain to your domain name.
Installing Nginx
Once you have your domain name set up, we can go ahead and install a web server software, such as Apache or Nginx. I would recommend using Nginx, because it functions well as both a web server and a reverse proxy server, which we'll be utilizing later in this guide. To set up Nginx, follow along with my Nginx Reverse Proxy Guide.
Once you have Nginx set up and you can visit your website from your domain name, we can move on to some other common services you may want to self-host as well.
Analytics
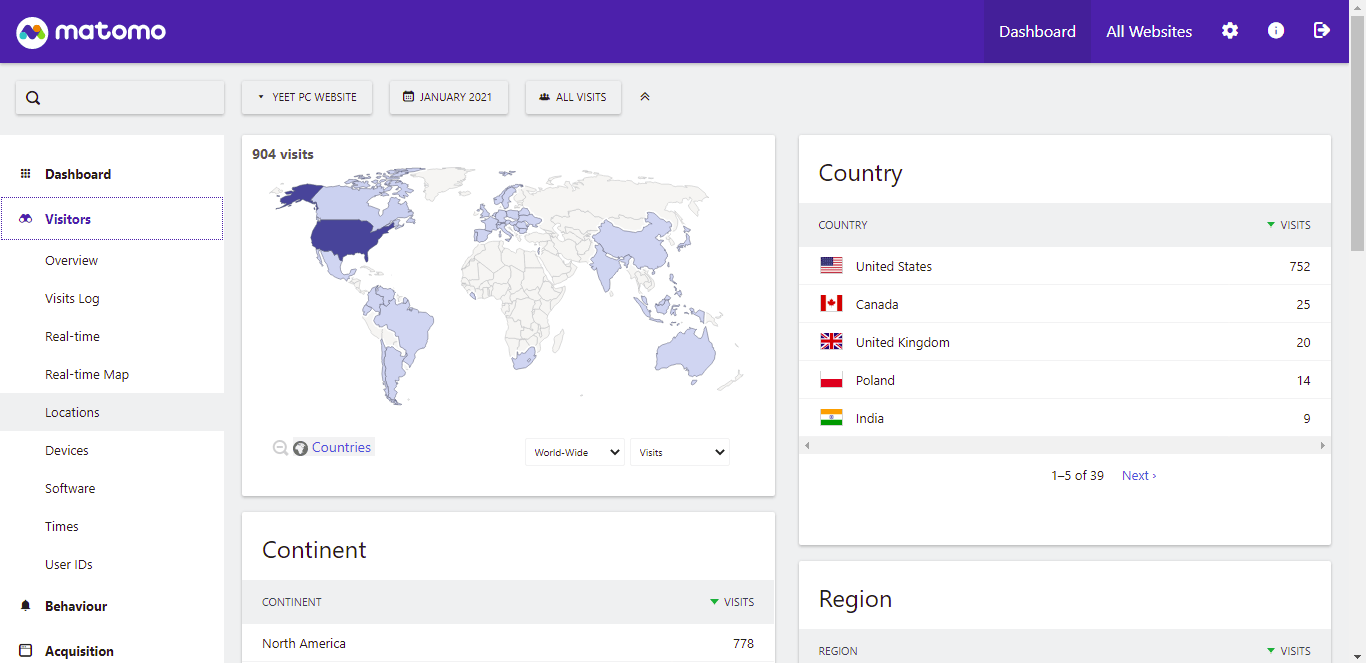
Once you get a relatively high number of users visiting your website(s), you may want to track how they interact with various pages and where they're coming from. To collect and analyze these metrics, many website owners will choose a service such as Google Analytics. The problem with this is that Google now has access to your user's data, including their IP address, their device manufacturer, their screen resolution, and a myriad of other metrics. Google can choose to share this data with a third party or use it to track users across sites and display personalized ads. This can become a liability for you and can frustrate your users.
Luckily, there are many self-hosted, privacy-respecting analytics platforms that provide very similar functionality to GA. Some of these are Matomo (formerly Piwik), Plausible, and Umami. For this site, I use Matomo, since it matches (and, in some cases, exceeds) the functionality of GA.
To install Matomo, follow their comprehensive installation guide.
After you've installed it, you'll be able to transparently track the activity of users on your website.
Commenting System
To engage with your site's visitors and answer any of their questions, you'll want to have a commenting system/plugin. When I first started this website, I was using Disqus, a free commenting system. The problem with Disqus is that they sell the info of your site's visitors to advertising companies, and it slows down your site significantly.
A self-hosted alternative to Disqus is Commento, which doesn't track users or sell their info, and is very lightweight. Commento also allows you to customize the CSS and features built-in spam detection. You'll find Commento running on my site below.
Before installing Commento, add a CNAME record for the subdomain "commento." Then, add a reverse proxy config for Commento using this sample file.
The best way to install Commento is by using Docker-compose. To do this, create a docker-compose.yml file with the following contents. (Make sure to change the COMMENTO_PORT and COMMENTO_ORIGIN to the port and subdomain name you want to use.) Then, type "sudo docker-compose up -d" to start the containers.
version: '3'

services:
  server:
    image: registry.gitlab.com/commento/commento:SET_VERSION
    ports:
      - 8080:8080
    environment:
      COMMENTO_ORIGIN: http://commento.example.com:8080
      COMMENTO_PORT: 8080
      COMMENTO_POSTGRES: postgres://postgres:postgres@db:5432/commento?sslmode=disable
    depends_on:
      - db
  db:
    image: postgres
    environment:
      POSTGRES_DB: commento
      POSTGRES_USER: postgres
      POSTGRES_PASSWORD: postgres
    volumes:
      - postgres_data_volume:/var/lib/postgresql/data

volumes:
  postgres_data_volume:
After the containers are up, visit https://commento.yourdomain.com to access Commento. Create an account in the dashboard and register your domain name. After this, add the following script tag on each page where you'd like Commento to load.
<div id="commento"></div>
<script defer
  src="http://commento.example.com/js/commento.js">
</script>
If you go to that page on your site, you should now see the comments box.
CDN & DDoS Protection
During the process of self-hosting your services, you might be afraid of an attacker trying to DDoS your website or hack it in some other way. Unlike major cloud providers, which have a very large amount of bandwidth, your home or office network likely has a much smaller amount. This means that even a small DDoS attack could cripple your entire network and cause a large outage.
To prevent malicious visitors from DDoS'ing your site, you can implement a CDN (content delivery network) like CloudFlare. CloudFlare hides your origin server's IP address and routes your traffic through their servers instead. It also uses cached versions of your webpages, which can help greatly with load times. Another advantage of their CDN is that your page will load just as quickly across the world as it will in the same city as your server.
To use CloudFlare's CDN, visit their website to sign up for a free or paid account and enroll your site.
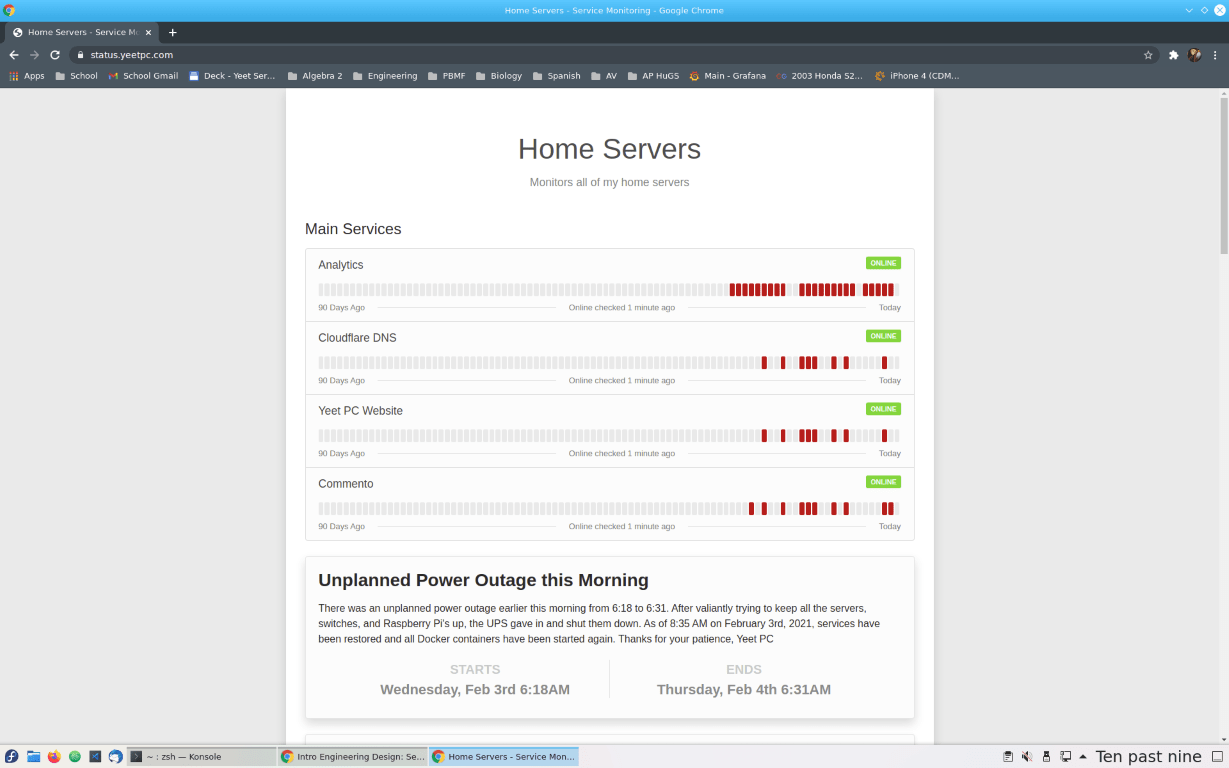
A Status Page
If you're providing a service to your web app's users, you might want to have some sort of a status page that can notify your users of planned and unplanned outages. A few status page softwares that you can self-host include Statping, Cachet, and Staytus. I personally use Statping for my statuspage, but you can use whichever one fits your use case. For whichever status page software you use, you should make sure to host it on a separate server from the ones you're monitoring. That way, when your server goes down, it doesn't take down the status page as well.
To install Statping on your server, you can use the docker command below.
sudo docker run -it -p 8080:8080 statping/statpingStatping will start on port 8080 of your server. To set it up, visit http://serverip:8080 and follow the installation steps. Statping will automatically monitor the services you add, and you can configure alerting rules for email, Telegram messages, and much more. Visit the Statping Github to learn more about advanced configuration.
The last thing you'll want to do is to add a reverse proxy config for your status page. To do this, add a CNAME DNS record for the "status" subdomain. Then, add a reverse proxy config for the status page using this sample file.
In this post, you've learned how to self host many of the major components of a website/webapp, which means you're no longer tied to large corporations, and your users can have more trust in your services.
Well, that's all for this post. If you liked reading, make sure to check out my other posts about self-hosting, such as Creating a Dashboard for Your Home Servers using Homer, and Hardening your Linux Server. Or, you can check out something completely unrelated like Using an iMac G5 in 2020. If you have any questions or comments, be sure to leave your thoughts down below. See y'all next time!